Edit image details across turns
| Section | Muse Image |
| Time to complete | ~15 min |
| Model | muse-image-1.0 |
| Language | Python |
| Prerequisites | Python 3.10+, the openai package, and a MODEL_API_KEY (create one in the Model API dashboard). |
Use this pattern to change a specific object or label in a photo across several turns. Pass previous_response_id with each new instruction so the prior image remains in context. Review every result to confirm the requested change and the areas that should remain unchanged.
This recipe starts from a resale photo. The first turn adds a price tag to each item. The next turn removes a sold item and marks down another. The same workflow applies to catalogs, listing tools, and e-commerce operations.
The edited images here are from an actual run. Because the model is non-deterministic, your results will differ.
What you build
You start from a photo you already have, showing several second-hand items laid out on a floor, and build:
- A tagged listing: your photo with a handwritten price added next to each item, in a single turn.
- An updated listing: the same image again after one item sells and another is marked down.
The first turn uploads your photo and adds the tags in one call. Every later turn passes previous_response_id and one new instruction, and the model refines the running image rather than starting over. You read the token usage the API returns on each turn.
How it works
You edit through the conversational Responses API. The first turn uploads your photo and creates a response. Each later turn references the previous response by id, so the server keeps the running image and you send only the new instruction:
- Turn 1:
client.responses.create(model="muse-image-1.0", input=[<your photo>, "..."])uploads your photo alongside the instruction and returns the edited image plus a response id. - Later turns:
client.responses.create(model="muse-image-1.0", previous_response_id=<prior id>, input="...")refine it. The server manages the state for you, so you do not resend the image. The prior image carries forward, and only the change you describe is applied.
The model reasons over each instruction before it renders. It understands what is in the image, decides what to change and what to leave alone, then draws the result as one coherent frame. You express the change in words (add a tag here, remove this item, mark this price down) and the model does the edit.
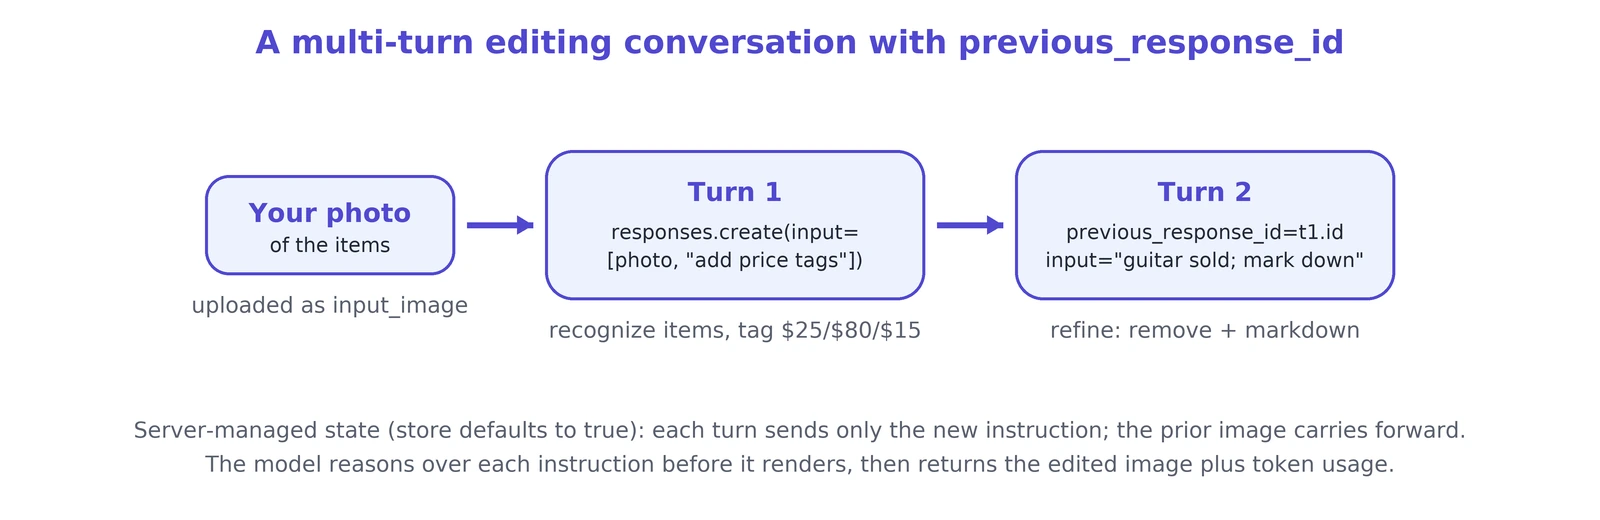
Each response has an id (resp_...), a status, and an output list. A completed response includes an image_generation_call item. It may also include a reasoning summary and an assistant message. Find the image by selecting the image_generation_call item and reading its base64 result. The usage object reports input, output, and total token counts.
Setup
Install the SDK and set your key:
bash
Wire up the client once. The OpenAI SDK does not auto-read MODEL_API_KEY, so pass it explicitly. Add two small helpers: one that encodes a local photo as a data: URL so you can upload it, and one that pulls the base64 image out of the image_generation_call output item and writes it to disk:
python
Turn 1: add a price tag to every item in your photo
Start from the photo you took of the items you want to sell: a brass desk lamp, an acoustic guitar, and a stack of books on a hardwood floor.
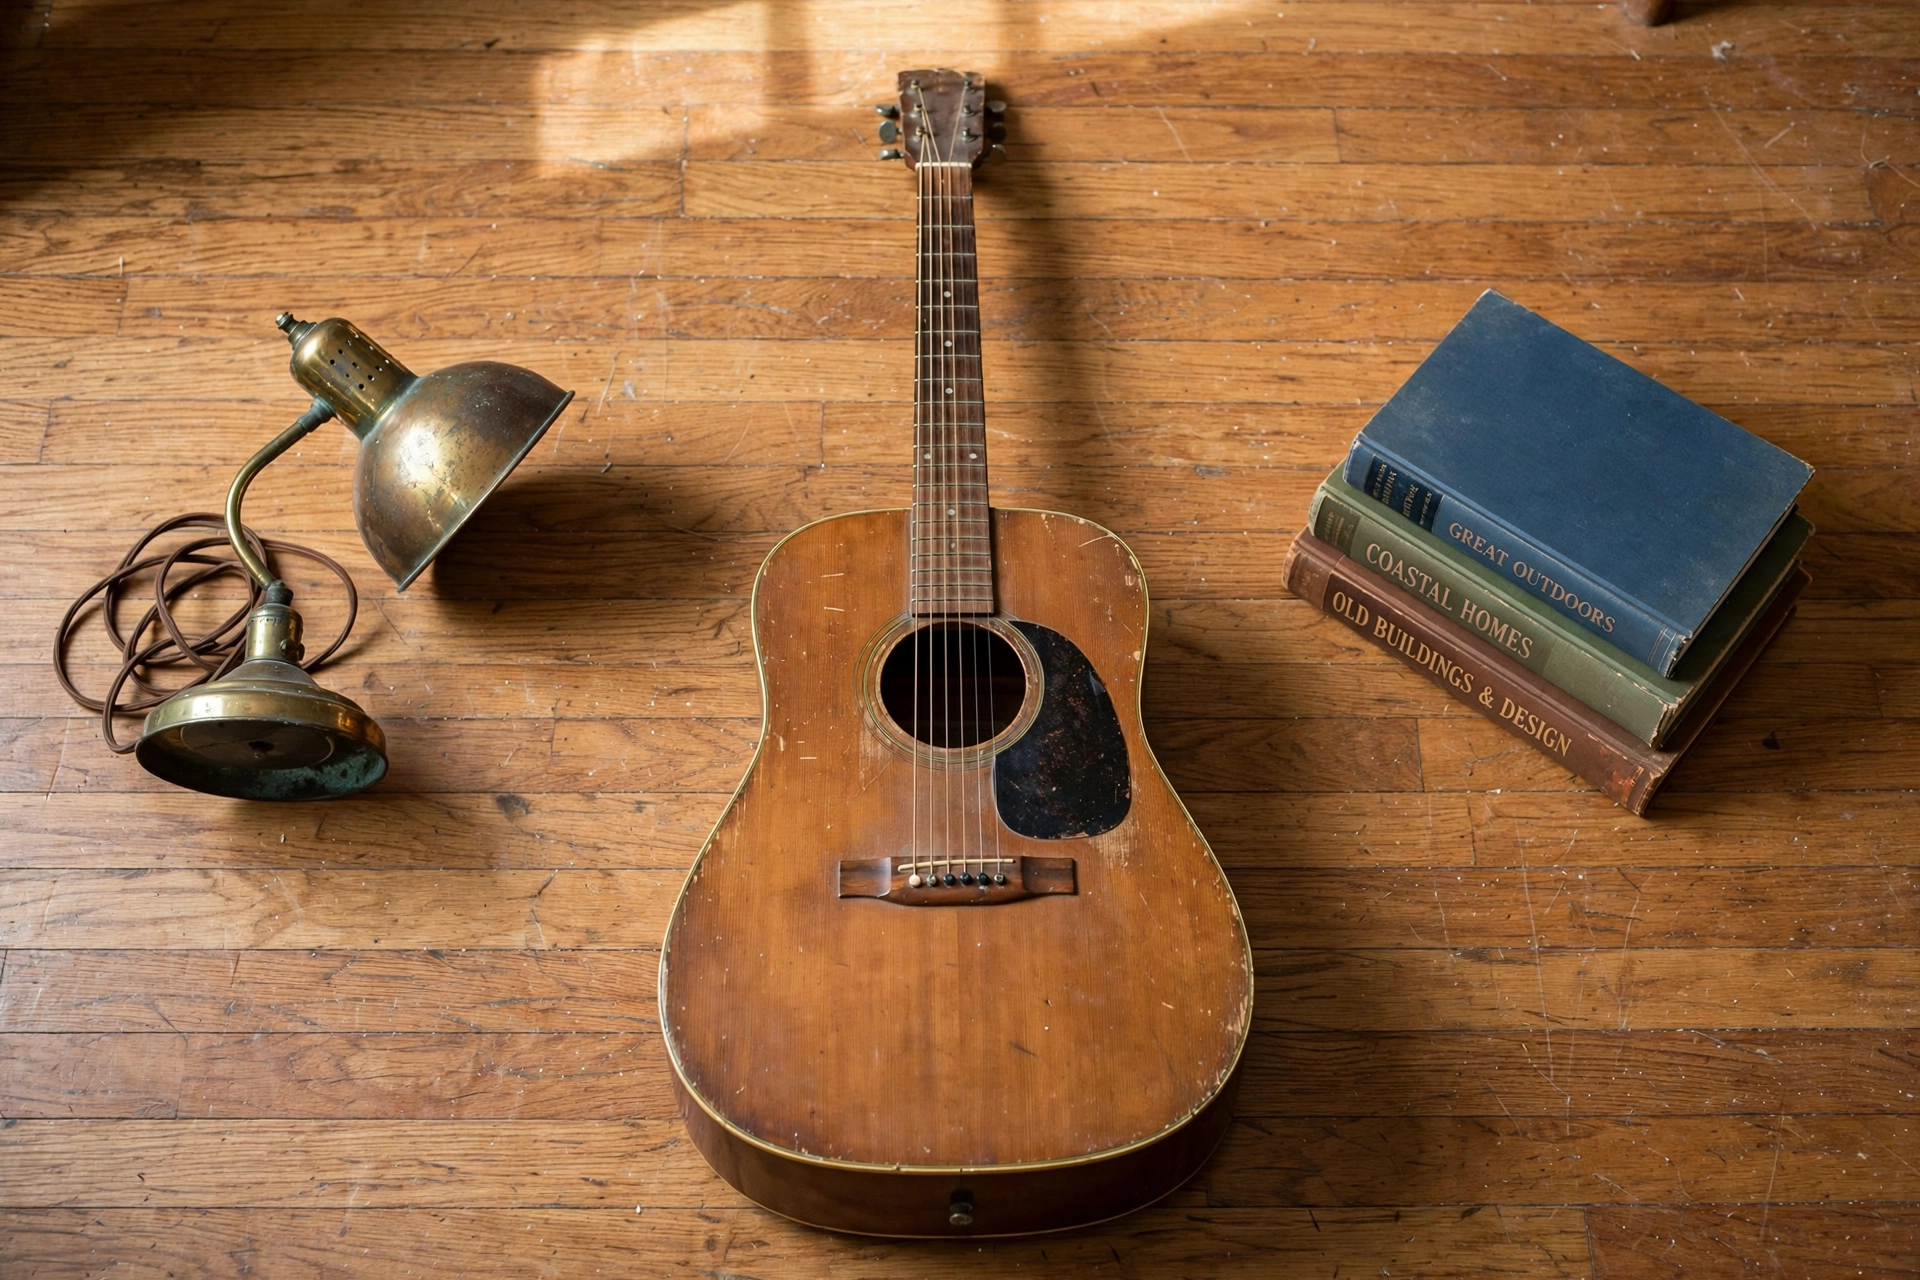
Upload that photo as an input_image content part alongside your instruction. The input is a list with a single user message whose content mixes input_text and input_image, and the image is a public URL or a data: URL. Ask for one price tag per item and name the price for each by the item it belongs to:
python
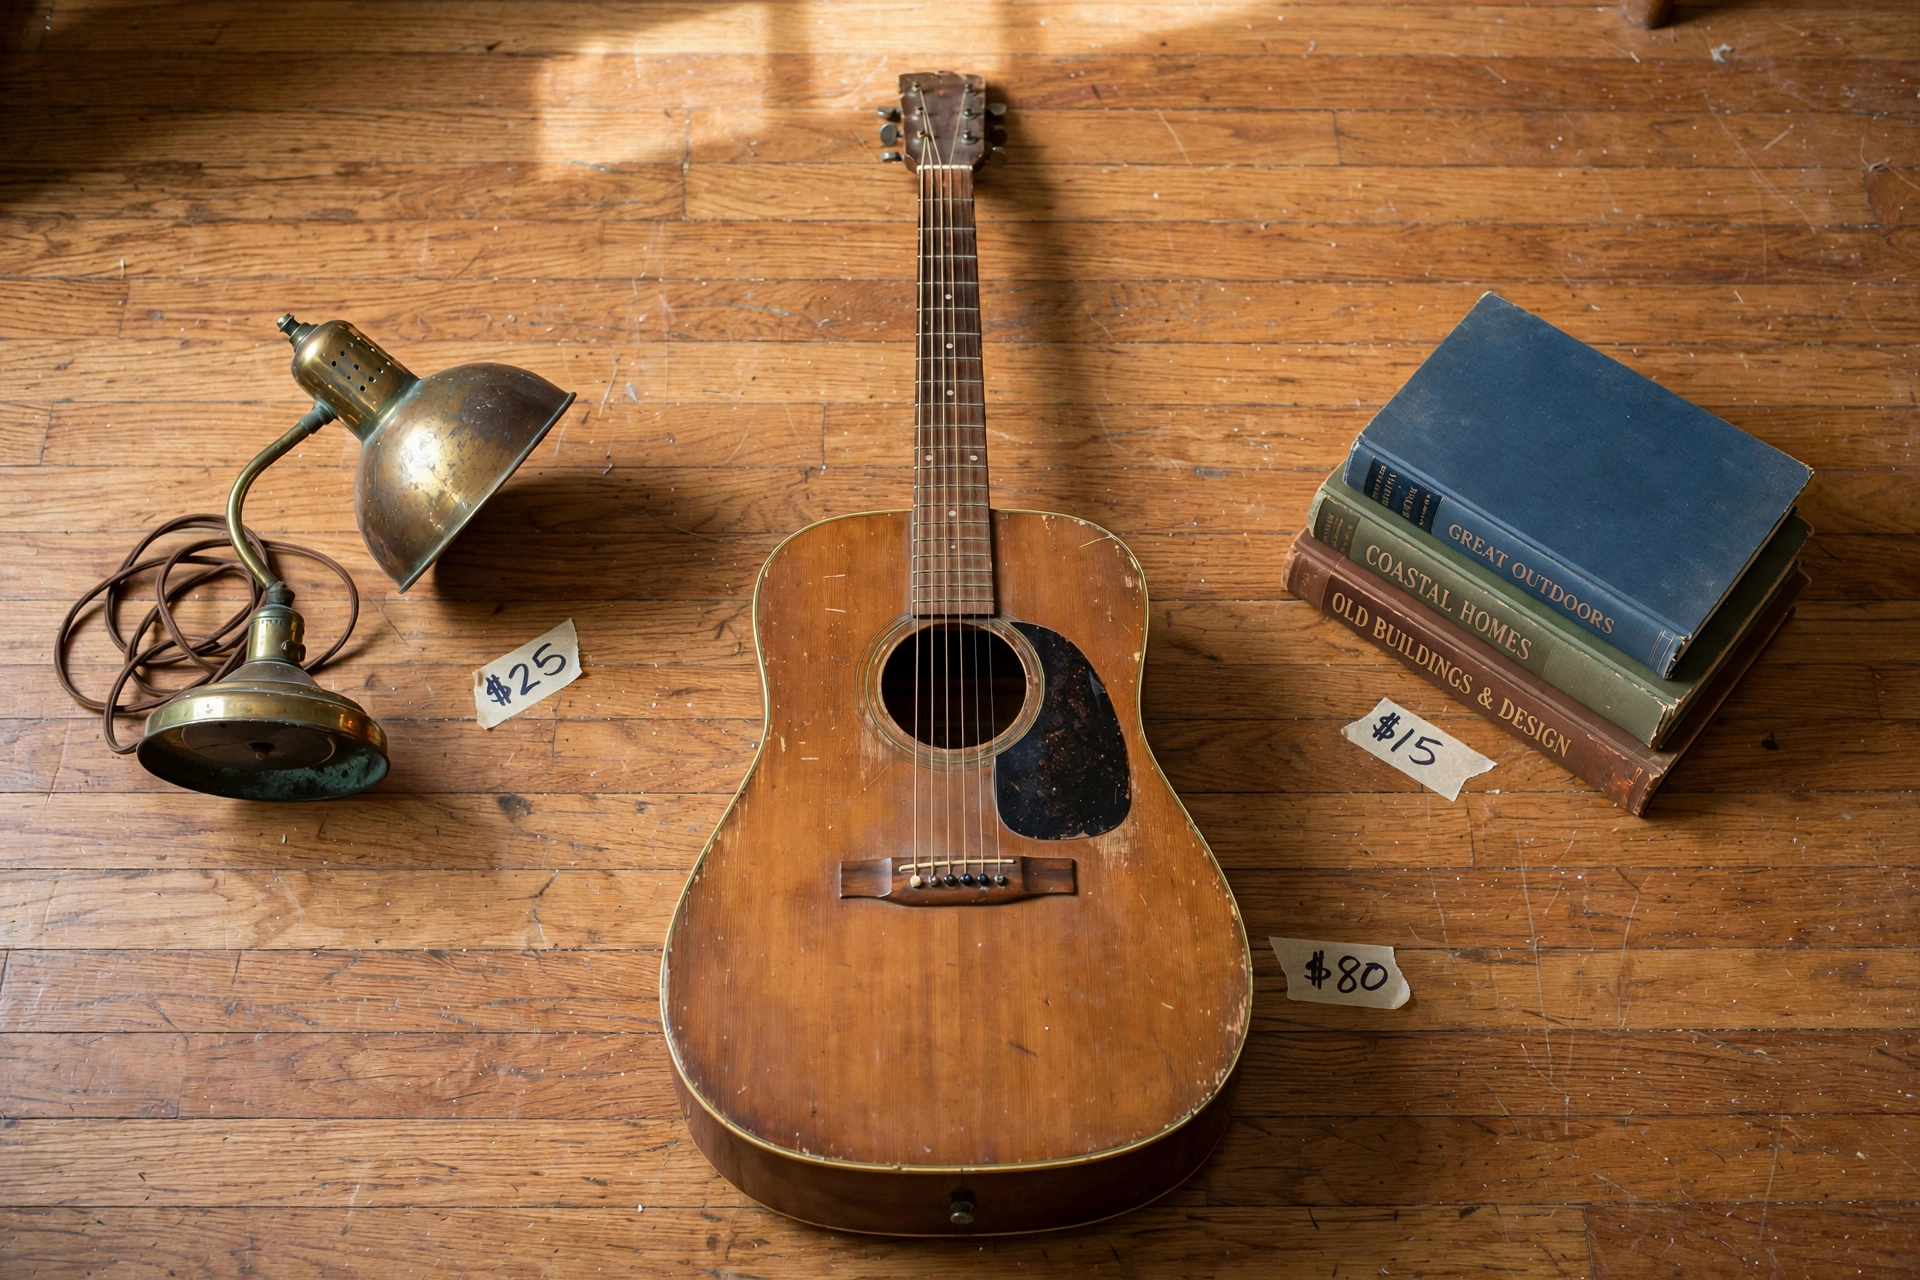
In this run, the model placed each price near the intended item: $25 by the lamp, $80 by the guitar, and $15 by the books. Compare the output with the original before using it.
Keep turn1.id. Every later turn passes it (or the id of a later turn) as previous_response_id, and that is what tells the model to keep editing this image instead of starting over.
The usage object reports the tokens the request consumed. input_tokens covers your prompt and the uploaded photo, and output_tokens covers the reasoning and the rendered image:
json
Turn 2: update the listing after a sale and a price cut
Real listings are not static: something sells and something drops in price. Both are one more turn in the same conversation. Reference turn 1 with previous_response_id and describe both changes in one instruction. You do not resend the image, because the model keeps the running image from turn 1. The guitar sold, so remove it and its tag. The books were marked down, so restrike the price:
python
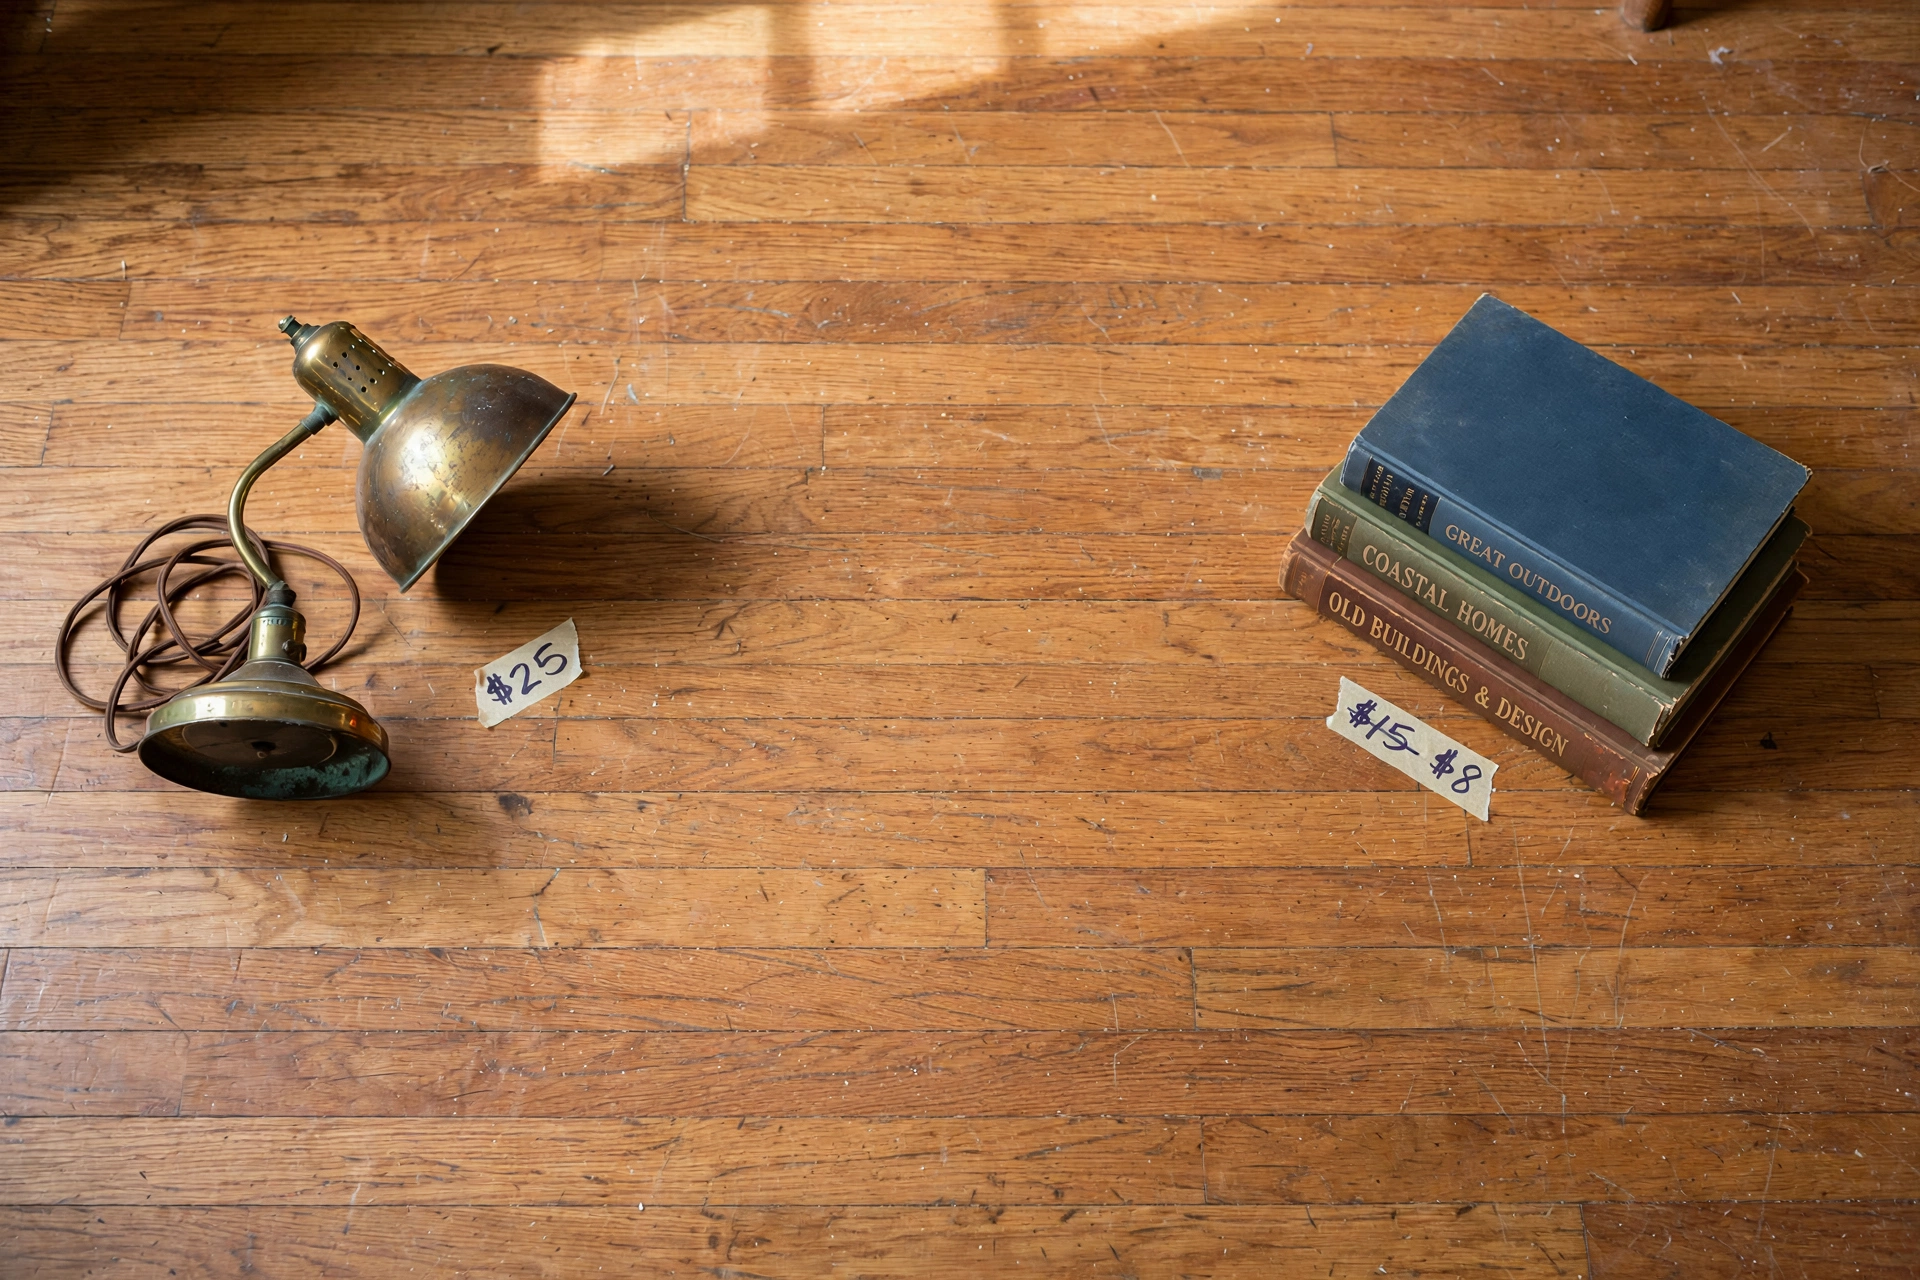
The struck-through old price and the new price are text the model draws from your instruction, the same way the tags were.
When you edit images that represent real items for sale, prompt the model to preserve the true condition and verify the output.
Editing without server-managed state
A store parameter defaults to true, so the server keeps each turn and previous_response_id is all you need. If you would rather manage state yourself, set store=False and replay the prior image item in the next turn's input, followed by the new instruction. Pull the image_generation_call item off the previous response and pass it back:
python
This provides the prior image as context without storing the conversation on the server. The generated result can still vary, so compare it with the source and the chained version.
Check the result
Confirm that the requested edit appears. Compare the output with the source image to identify changes in other areas.
| Task | Call |
|---|---|
| Start from your photo | input=[{"role": "user", "content": [input_text, input_image]}] |
| Refine the image | client.responses.create(model="muse-image-1.0", previous_response_id=prior.id, input="...") |
| Add price tags | upload with input="add a price tag: $X on the <item>, $Y on the <item>..." |
| Update a listing | refine with input="remove the <sold item>; show $X struck through with $Y" |
| Read the image | next(i.result for i in resp.output if i.type == "image_generation_call"), then base64.b64decode |
| Read token usage | resp.usage (input, output, total, plus reasoning tokens) |
Production checklist:
- Read
MODEL_API_KEYfrom the environment, never hard-code it. - Upload your photo as an
input_image(public URL ordata:URL) and name each item in the instruction so the model tags the right one. - Refine over turns with
previous_response_idrather than re-uploading the image each turn, since the model carries the running image forward. - Name what changes and what stays (remove the guitar, keep the lamp's $25 tag) so untouched parts stay stable across turns.
- Treat price text and strikethroughs as drawn labels, not a pricing feature, and re-run a turn when exact text rendering is unclear.
- Bind each price to its item by name in the prompt (lamp $25, guitar $80, books $15) so the model writes the right price next to the right item.
- When an image represents a real item, tell the model to preserve its true condition and verify the output before you publish, since the model may miss or clean up visible wear.
- Pull the image from the
image_generation_calloutput item, decode the base64, and persist the bytes. - Watch the
usagetoken counts to stay inside your team's rate limits.
Next steps
- Reference the image guide: the Image generation guide covers reference-image steering and multi-turn editing in depth.
- See the full schema: the Responses API reference has every request and response field.
- Start from the basics: the Muse Image basics recipe walks through generate and edit one step at a time.