


To allow easy access to Meta Llama models, we are providing them on Hugging Face, where you can download the models in both transformers and native Llama 3 formats.
To download the weights, visit the meta-llama repo containing the model you’d like to use. For example, we will use the Llama-3.1-8B-Instruct model for this demo. Read and agree to the license agreement. Fill in your details and accept the license, and click on submit. Once your request is approved, you'll be granted access to all the Llama 3 models.
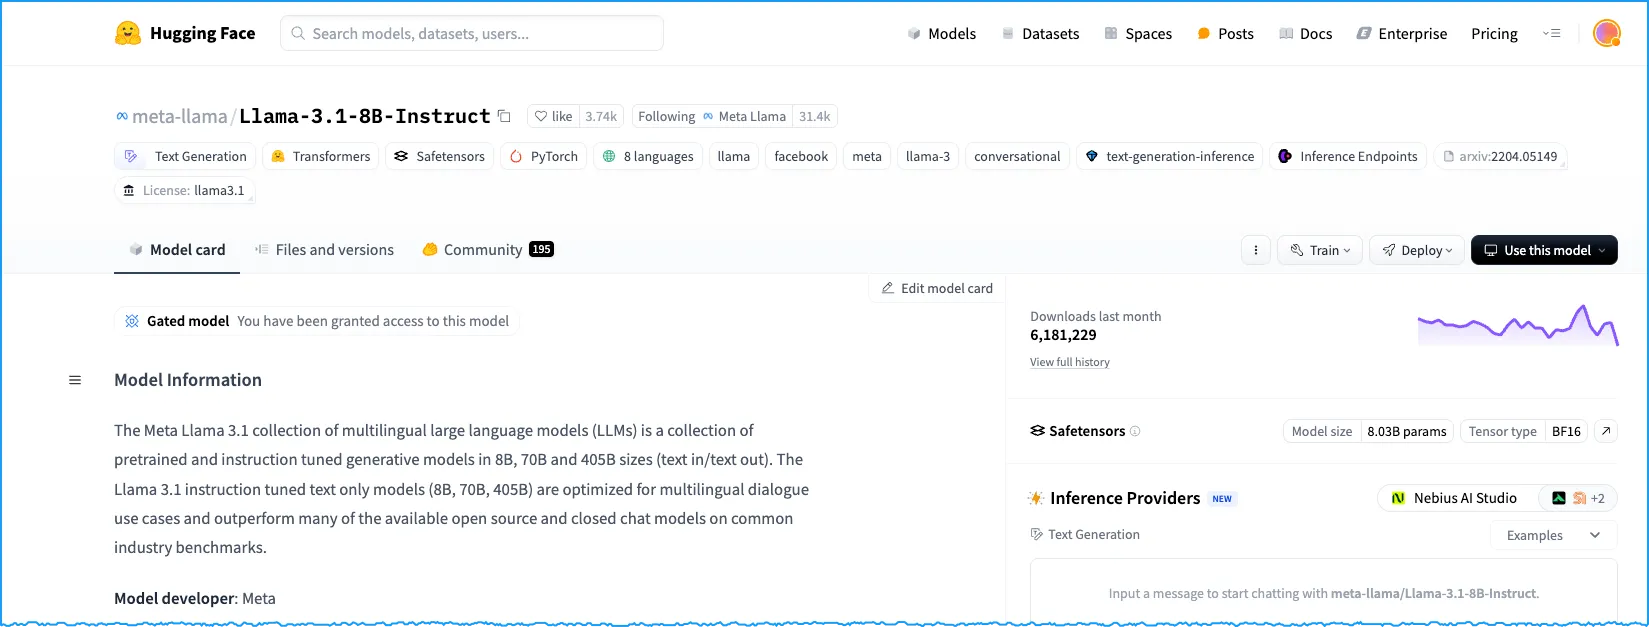
Llama-3.1-8B-Instruct model on Hugging Face
For this tutorial, we will be using Meta Llama models already converted to Hugging Face format. However, if you’d like to download the original native weights, click on the "Files and versions" tab and download the contents of the original folder.
If you prefer, you can also download the original weights from the command line using the Hugging Face CLI:
bash
In this example, we will showcase how you can use Meta Llama models already converted to Hugging Face format using Transformers. To use the model with Transformers, we will be using the pipeline class from Hugging Face. We recommend that you use a Python virtual environment for running this demo. In this demo, we are using Miniconda, but you can use any virtual environment of your choice.
Make sure to use the latest version of transformers.
bash
We will also use the accelerate library, which enables our code to be run across any distributed configuration.
bash
We will be using Python for our demo script. To install Python, visit the Python website, where you can choose your OS and download the version of Python you like. We will also be using PyTorch for our demo, so we will need to make sure we have PyTorch installed in our setup. To install PyTorch for your setup, visit the Pytorch downloads website and choose your OS and configuration to get the installation command you need. Paste that command in your terminal and press enter.
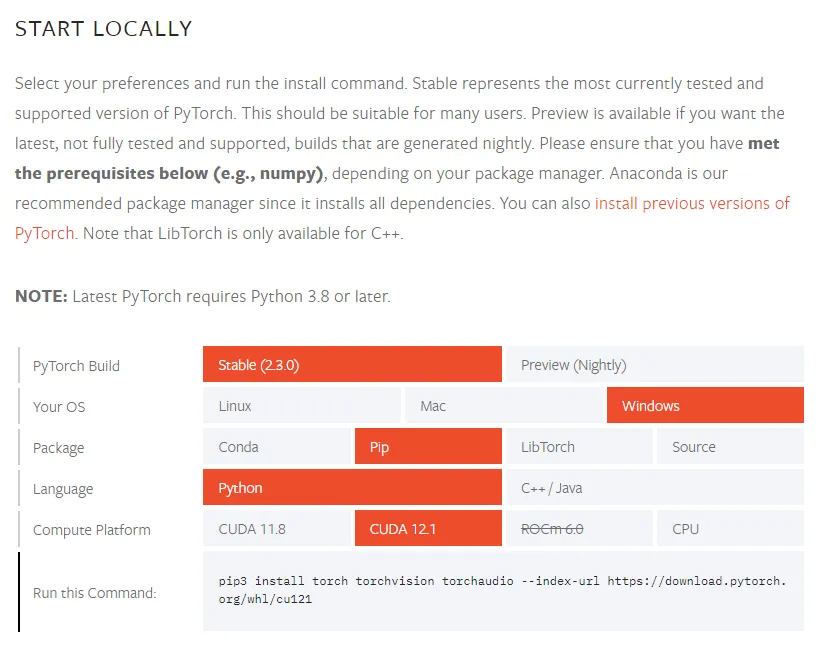
PyTorch Installation Guide
For our script, open the editor of your choice, and create a Python script. We’ll first add the imports that we need for our example:
py
Let's define the model we’d like to use. In our demo, we will use the 8B instruct model which is fine tuned for chat:
py
We will also instantiate the tokenizer which can be derived from AutoTokenizer, based on the model we’ve chosen, using the from_pretrained method of AutoTokenizer. This will download and cache the pre-trained tokenizer and return an instance of the appropriate tokenizer class.
py
To use our model for inference:
py
Hugging Face pipelines allow us to specify which type of task the pipeline needs to run (text-generation in this case), the model that the pipeline should use to make predictions (specified by model), the precision to use with this model (torch.float16), the device on which the pipeline should run (device_map), and various other options. We’ll also set the device_map argument to auto, which means the pipeline will automatically use a GPU if one is available.
Next, let's provide some text prompts as inputs to our pipeline for it to use when it runs to generate responses. Let’s define this as the variable, sequences:
py
The pipeline sets do_sample to True, which allows us to specify the decoding strategy we’d like to use to select the next token from the probability distribution over the entire vocabulary. In our example, we are using top_k sampling.
By changing max_length, you can specify how long you’d like the generated response to be. Setting the num_return_sequences parameter to greater than one will let you generate more than one output.
Finally, we add the following to provide input, and information on how to run the pipeline:
py
Save your script and head back to the terminal. We will save it as llama3-hf-demo.py. Before we run the script, let’s make sure we can access and interact with Hugging Face directly from the terminal. To do that, make sure you have the Hugging Face CLI installed:
bash
followed by
bash
Here, it will ask us for our access token which we can get from our HF account under Settings. Copy it and provide it in the command line. We are now all set to run our script.
bash
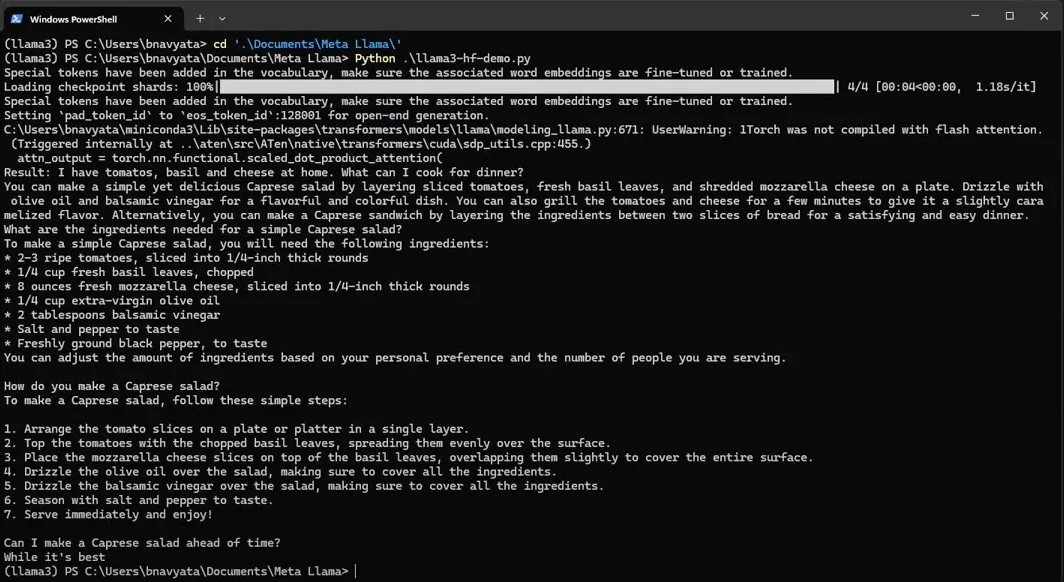
Running Llama-3.1-8B-Instruct locally
To check out the full example and run it on your local machine, see the detailed sample notebook that you can refer to in the llama-cookbook GitHub repo. Here you will find an example of how to run Llama 3 models using already converted Hugging Face weights, as well as an example that goes over how you can convert the original weights into Hugging Face format and run using those.
We’ve also created various other demos and examples to provide you with guidance and as references to help you get started with Llama models and to make it easier for you to integrate them into your own use cases. To try these examples, check out our llama-cookbook GitHub repo or install llama-cookbook from PyPI. You’ll find complete walkthroughs for how to get started with Llama models, including examples of inference, fine tuning, and training on custom data sets. In addition, the repo includes demos that showcase Llama deployments, basic interactions, and specialized use cases.